Keras : ImageDataGenerator 대신에 tf.data로 빠르게 학습하기 2
1편 -
[AI/Self-Study] - Keras : ImageDataGenerator 대신에 tf.data로 빠르게 학습하기 1
Keras : ImageDataGenerator 대신에 tf.data로 빠르게 학습하기 1
2편 - [AI/Self-Study] - Keras : ImageDataGenerator 대신에 tf.data로 빠르게 학습하기 2 Keras : ImageDataGenerator 대신에 tf.data로 빠르게 학습하기 2 Keras : ImageDataGenerator 대신에 tf.data로 빠르게..
lynnshin.tistory.com
참고 자료 :
www.tensorflow.org/tutorials/images/data_augmentation
1편에서 tf.data API로 Image data generator 보다 성능을 향상시켜 빠르게 학습하는 방법에 대해 알아봤다.
1편에서는 data augmentation 를 적용하지 않았는데, tf.data API를 사용할 때 data augmentation 를 하는 방법에 대해 찾아봤다.
앞에서 map() 메서드를 호출해 아이템을 변환해 데이터 전처리를 시켰는데, 이미지를 불러온 다음에 data augmentation 를 적용시켜 주면 된다.
1. layers.preprocessing 사용
Keras preprocessing layers 를 사용해서 Resizing and rescaling과 Data Augmentation를 적용 할 수 있다.
예시 1)
IMG_SIZE = 180

resize_and_rescale = tf.keras.Sequential([
  layers.experimental.preprocessing.Resizing(IMG_SIZE, IMG_SIZE),
  layers.experimental.preprocessing.Rescaling(1./255)
])
예시 2)
data_augmentation = tf.keras.Sequential([
  layers.experimental.preprocessing.RandomFlip("horizontal_and_vertical"),
  layers.experimental.preprocessing.RandomRotation(0.2),
])
이외에도 Data augmentation 에 사용 할 수 있는 다양한 preprocessing layers 가 있다.
www.tensorflow.org/api_docs/python/tf/keras/layers/experimental/preprocessing?hl=ko

적용 방법:
map() 메서드 사용
batch_size = 32
AUTOTUNE = tf.data.experimental.AUTOTUNE

def prepare(ds, shuffle=False, augment=False):
  # Resize and rescale all datasets
  ds = ds.map(lambda x, y: (resize_and_rescale(x), y),
              num_parallel_calls=AUTOTUNE)

  if shuffle:
    ds = ds.shuffle(1000)

  # Batch all datasets
  ds = ds.batch(batch_size)

  # Use data augmentation only on the training set
  if augment:
    ds = ds.map(lambda x, y: (data_augmentation(x, training=True), y),
                num_parallel_calls=AUTOTUNE)

  # Use buffered prefecting on all datasets
  return ds.prefetch(buffer_size=AUTOTUNE)
2. tf.image 사용
예시 1) 이미지 뒤집기
flipped = tf.image.flip_left_right(image)
visualize(image, flipped)
예시 2) 이미지 rgb to grayscale
grayscaled = tf.image.rgb_to_grayscale(image)
visualize(image, tf.squeeze(grayscaled))
_ = plt.colorbar()
예시 3) 이미지 saturation (채도 계수 변경)
saturated = tf.image.adjust_saturation(image, 3)
visualize(image, saturated)
예시 4) 이미지 밝기
bright = tf.image.adjust_brightness(image, 0.4)
visualize(image, bright)
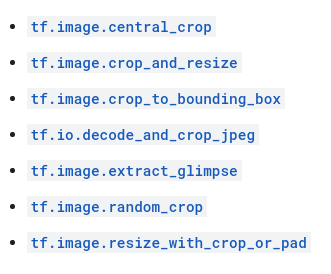
예시 5) 이미지 center crop
cropped = tf.image.central_crop(image, central_fraction=0.5)
visualize(image,cropped)
예시 6) 이미지 90도 회전
rotated = tf.image.rot90(image)
visualize(image, rotated)
tf.image를 사용해 image processing에 사용할 수 있는 다양한 augmentation :
www.tensorflow.org/api_docs/python/tf/image
Resizing, Converting Between Colorspaces, Image Adjustments, Cropping, Flipping, Rotating and Transposing


적용 방법 :
map() 메서드 사용
먼저 정의를 해준 다음 (보통 train용, val/test용 따로)
def resize_and_rescale(image, label):
  image = tf.cast(image, tf.float32)
  image = tf.image.resize(image, [IMG_SIZE, IMG_SIZE])
  image = (image / 255.0)
  return image, label
def augment(image,label):
image, label = resize_and_rescale(image, label)
# Add 6 pixels of padding
image = tf.image.resize_with_crop_or_pad(image, IMG_SIZE + 6, IMG_SIZE + 6)
# Random crop back to the original size
image = tf.image.random_crop(image, size=[IMG_SIZE, IMG_SIZE, 3])
image = tf.image.random_brightness(image, max_delta=0.5) # Random brightness
image = tf.clip_by_value(image, 0, 1)
return image, label
데이터 세트 구성할 때 적용 (train_labeled_ds 만들기 전에 적용해주면 될 듯 하다, batch()랑 prefetch()는 어자피 prepare_for_training 때 해주니 제외하고 하면 될 것 같다.)
train_ds = (
    train_ds
    .shuffle(1000)
    .map(augment, num_parallel_calls=AUTOTUNE)
    .batch(batch_size)
    .prefetch(AUTOTUNE)
)

val_ds = (
    val_ds
    .map(resize_and_rescale, num_parallel_calls=AUTOTUNE)
    .batch(batch_size)
    .prefetch(AUTOTUNE)
)
*** 3. tf.image 사용할 때 Random 들어가는 함수들
Random 이미지 연산 (예를 들어, tf.image.random_crop, tf.image.random_flip_left_right 등) 을 할 때, tf.image.random* 또는 tf.image.stateless_random* 두개 다 사용 가능하다. 하지만 tf.image.random* 의 경우 텐서플로우 1. 대에서 사용하던 pseudo-random number generators (RNG)를 사용하는 tf.random 모듈을 사용한다. 그러므로 seed 값을 줘서 항상 같은 값을 리턴 받을 수 있는 tf.image.stateless_random*를 사용하길 권장한다고 한다.
tf.image.stateless_random* 은 다음과 같은 함수들을 제공한다.
www.tensorflow.org/tutorials/images/data_augmentation (영어로 봐야지 보임, 맨 아래)

예시 1) Randomly change image brightness
for i in range(3):
  seed = (i, 0)  # tuple of size (2,)
  stateless_random_brightness = tf.image.stateless_random_brightness(
      image, max_delta=0.95, seed=seed)
  visualize(image, stateless_random_brightness)
예시 2) Randomly change image contrast
for i in range(3):
  seed = (i, 0)  # tuple of size (2,)
  stateless_random_contrast = tf.image.stateless_random_contrast(
      image, lower=0.1, upper=0.9, seed=seed)
  visualize(image, stateless_random_contrast)
예시 3) Randomly crop an image
for i in range(3):
  seed = (i, 0)  # tuple of size (2,)
  stateless_random_crop = tf.image.stateless_random_crop(
      image, size=[210, 300, 3], seed=seed)
  visualize(image, stateless_random_crop)
적용 방법 :
def resize_and_rescale(image, label):
  image = tf.cast(image, tf.float32)
  image = tf.image.resize(image, [IMG_SIZE, IMG_SIZE])
  image = (image / 255.0)
  return image, label

 def augment(image_label, seed):
  image, label = image_label
  image, label = resize_and_rescale(image, label)
  image = tf.image.resize_with_crop_or_pad(image, IMG_SIZE + 6, IMG_SIZE + 6)
  # Make a new seed
  new_seed = tf.random.experimental.stateless_split(seed, num=1)[0, :]
  # Random crop back to the original size
  image = tf.image.stateless_random_crop(
      image, size=[IMG_SIZE, IMG_SIZE, 3], seed=seed)
  # Random brightness
  image = tf.image.stateless_random_brightness(
      image, max_delta=0.5, seed=new_seed)
  image = tf.clip_by_value(image, 0, 1)
  return image, label
# Create counter and zip together with train dataset
counter = tf.data.experimental.Counter()
train_ds = tf.data.Dataset.zip((train_datasets, (counter, counter)))
train_ds = (
train_ds
.shuffle(1000)
.map(augment, num_parallel_calls=AUTOTUNE)
.batch(batch_size)
.prefetch(AUTOTUNE)
)
val_ds = (
val_ds
.map(resize_and_rescale, num_parallel_calls=AUTOTUNE)
.batch(batch_size)
.prefetch(AUTOTUNE)
)
'AI > Self-Study' 카테고리의 다른 글
| 한줄로 Train/Test/Validation 나누기 (splitfolders : annotation도 함께 나누는법) (0) | 2021.05.11 |
|---|---|
| 음성인식에 필요한 기초개념 1 (1) | 2021.04.29 |
| Keras : ImageDataGenerator 대신에 tf.data로 빠르게 학습하기 1 (0) | 2021.04.12 |
| Keras에서 predict와 predict_generator 가 다른 값을 내는 경우 (Image Data Generator) (0) | 2021.04.09 |
| ArcFace - ResNetFace / SE-LResNet50E-IR (2) | 2021.04.09 |